October 29

Farm Notes

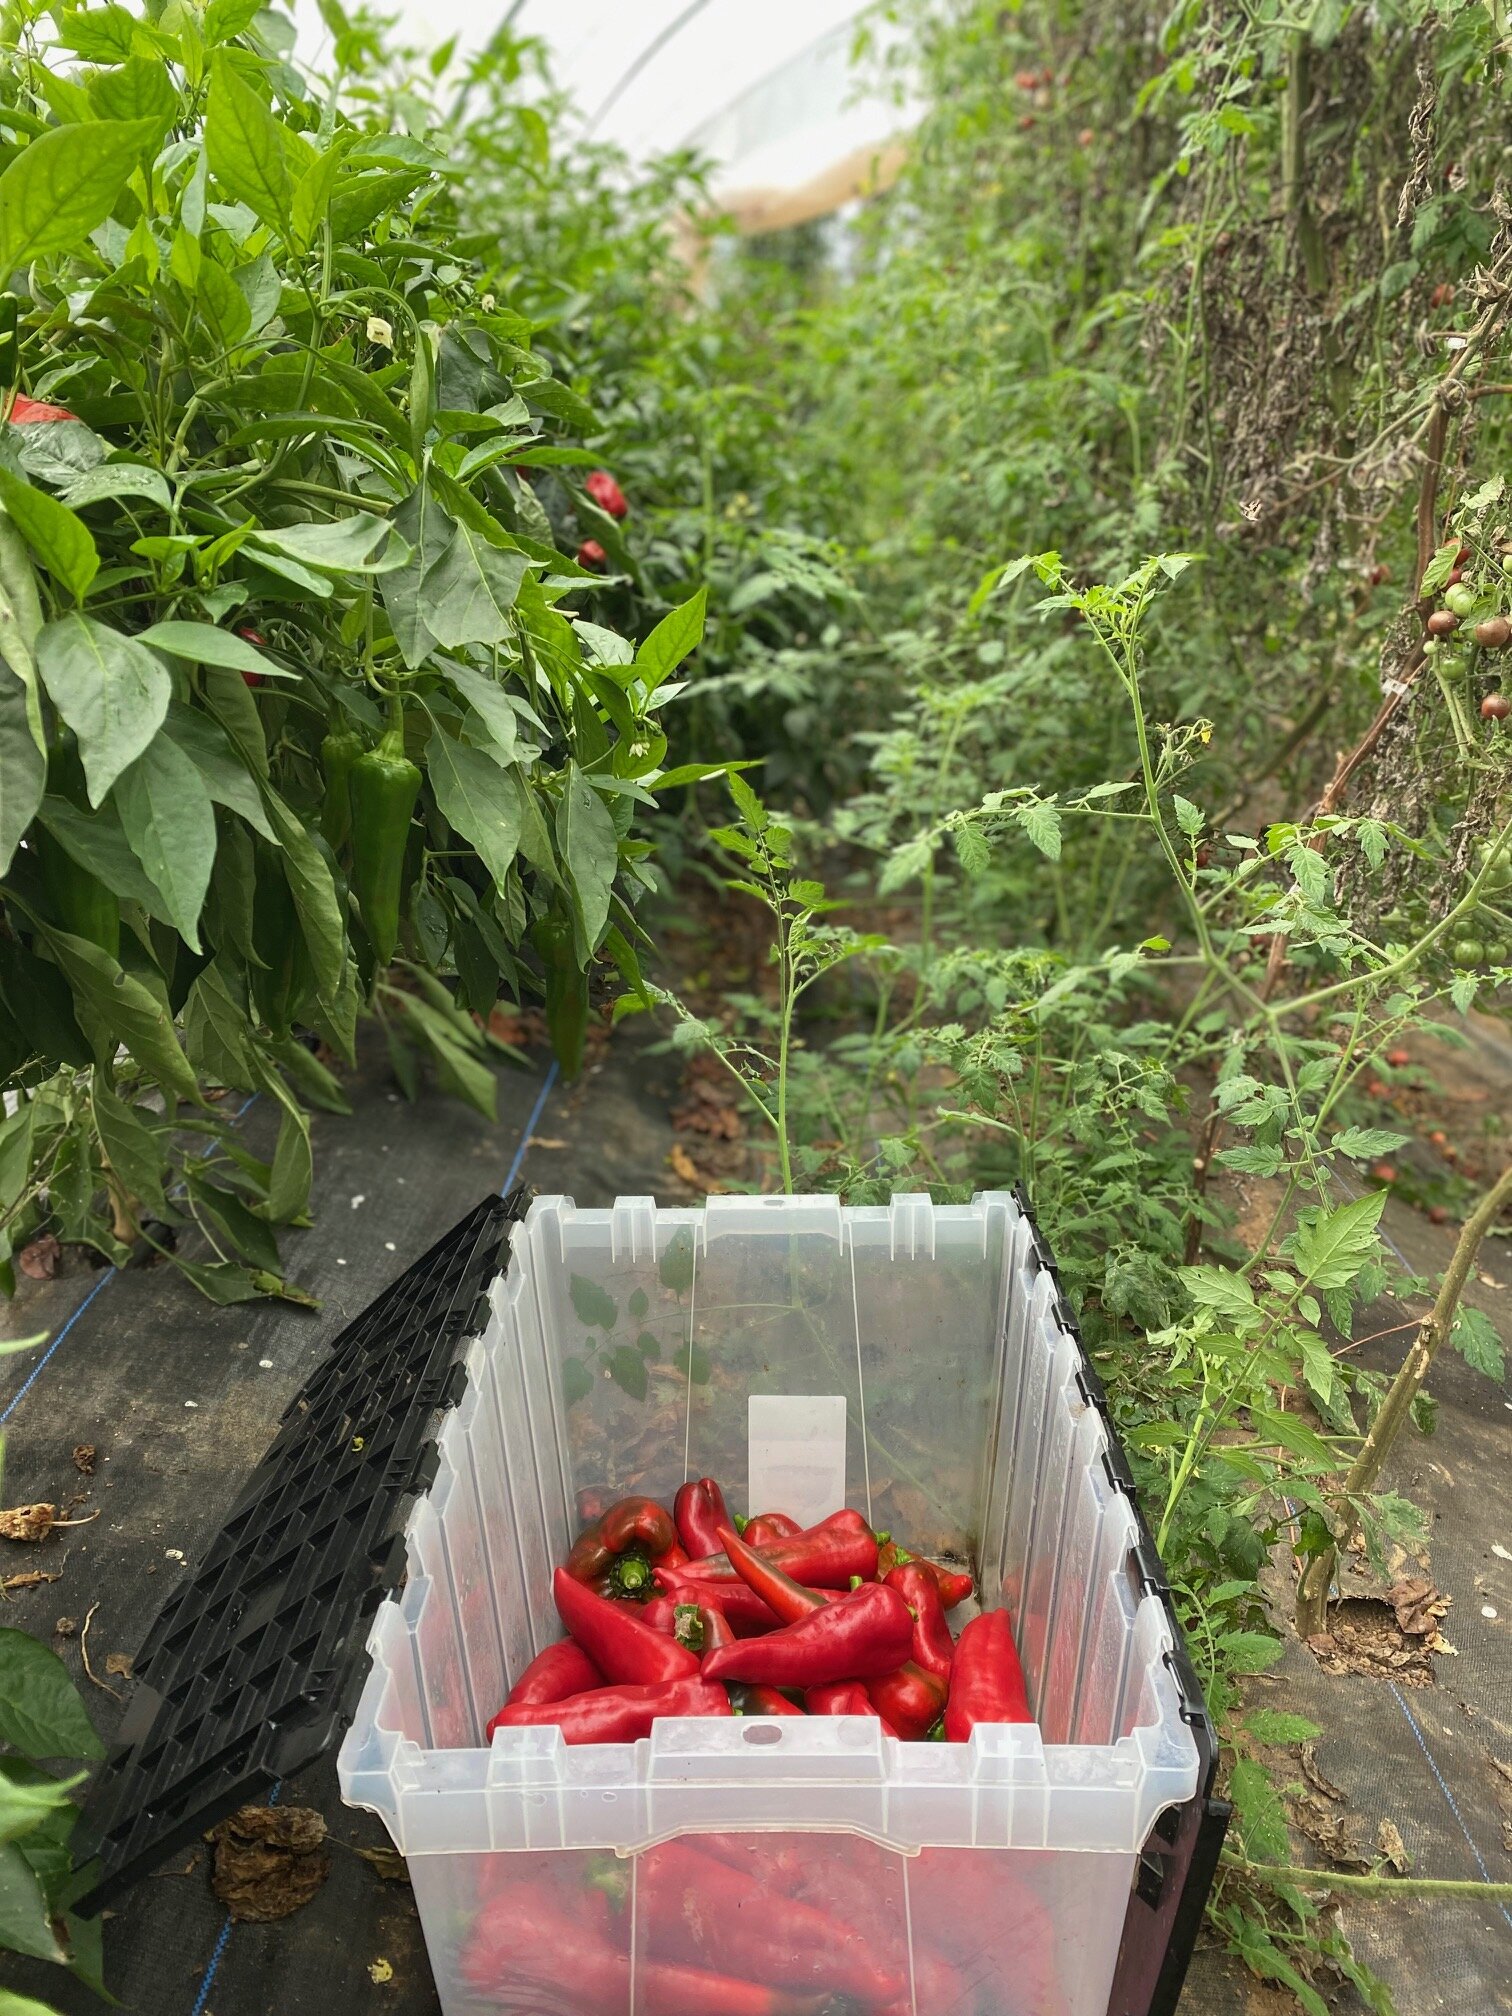
It’s been a quiet week on the farm, as we (both humans and plants alike) start to really lean into the the seasonal changes of less daylight and cooler temps. While there are still weeds galore to be pulled, their rate of growth has significantly decreased (yay!), and the grass no longer needs to be mowed every week (double yay!). Our greens and lettuces are thriving, while our summer eggplant and peppers are having their last hoorah (and will likely be pulled out in the next 1-2 weeks). Still no frost in the 7-day forecast, and I have a feeling that the first freeze will happen around the second week of November.

I had thought that the garlic would go in the ground this week, but we only had enough time to get the future garlic beds prepped… and so the garlic will definitely go in next Thursday! Garlic is an amazing plant that gets planted in late October-early November, and it will grow all winter + spring until it is ready to be harvested in the summer. It’s a crop that requires quite a bit of patience, but the payoff of getting to eat delicious, homegrown garlic is totally worth it. You don’t need much space to grow garlic, so now is a great time to give it a try! Not sure how to get started? Here are some helpful resources for planting fall garlic:

  • How to plant garlic – this is a quick and handy guide to growing garlic from the Hudson Valley Seed Co.

  • More garlic growing tips from our friends at Country Farm & Home, located down the road in Pittsboro, NC. If you are local to the Triangle area in NC, Country Farm & Home is our go-to spot to purchase garlic for fall planting, and NOW is the time to head over there and grab some garlic if you're looking to plant this fall! See a full listing of all their garlic varieties available here.

  • If you're more of a visual learner, below is a helpful video guide to all things garlic.

farmers_market_fall-9.jpg

Kitchen Notes

Hakurei.JPG

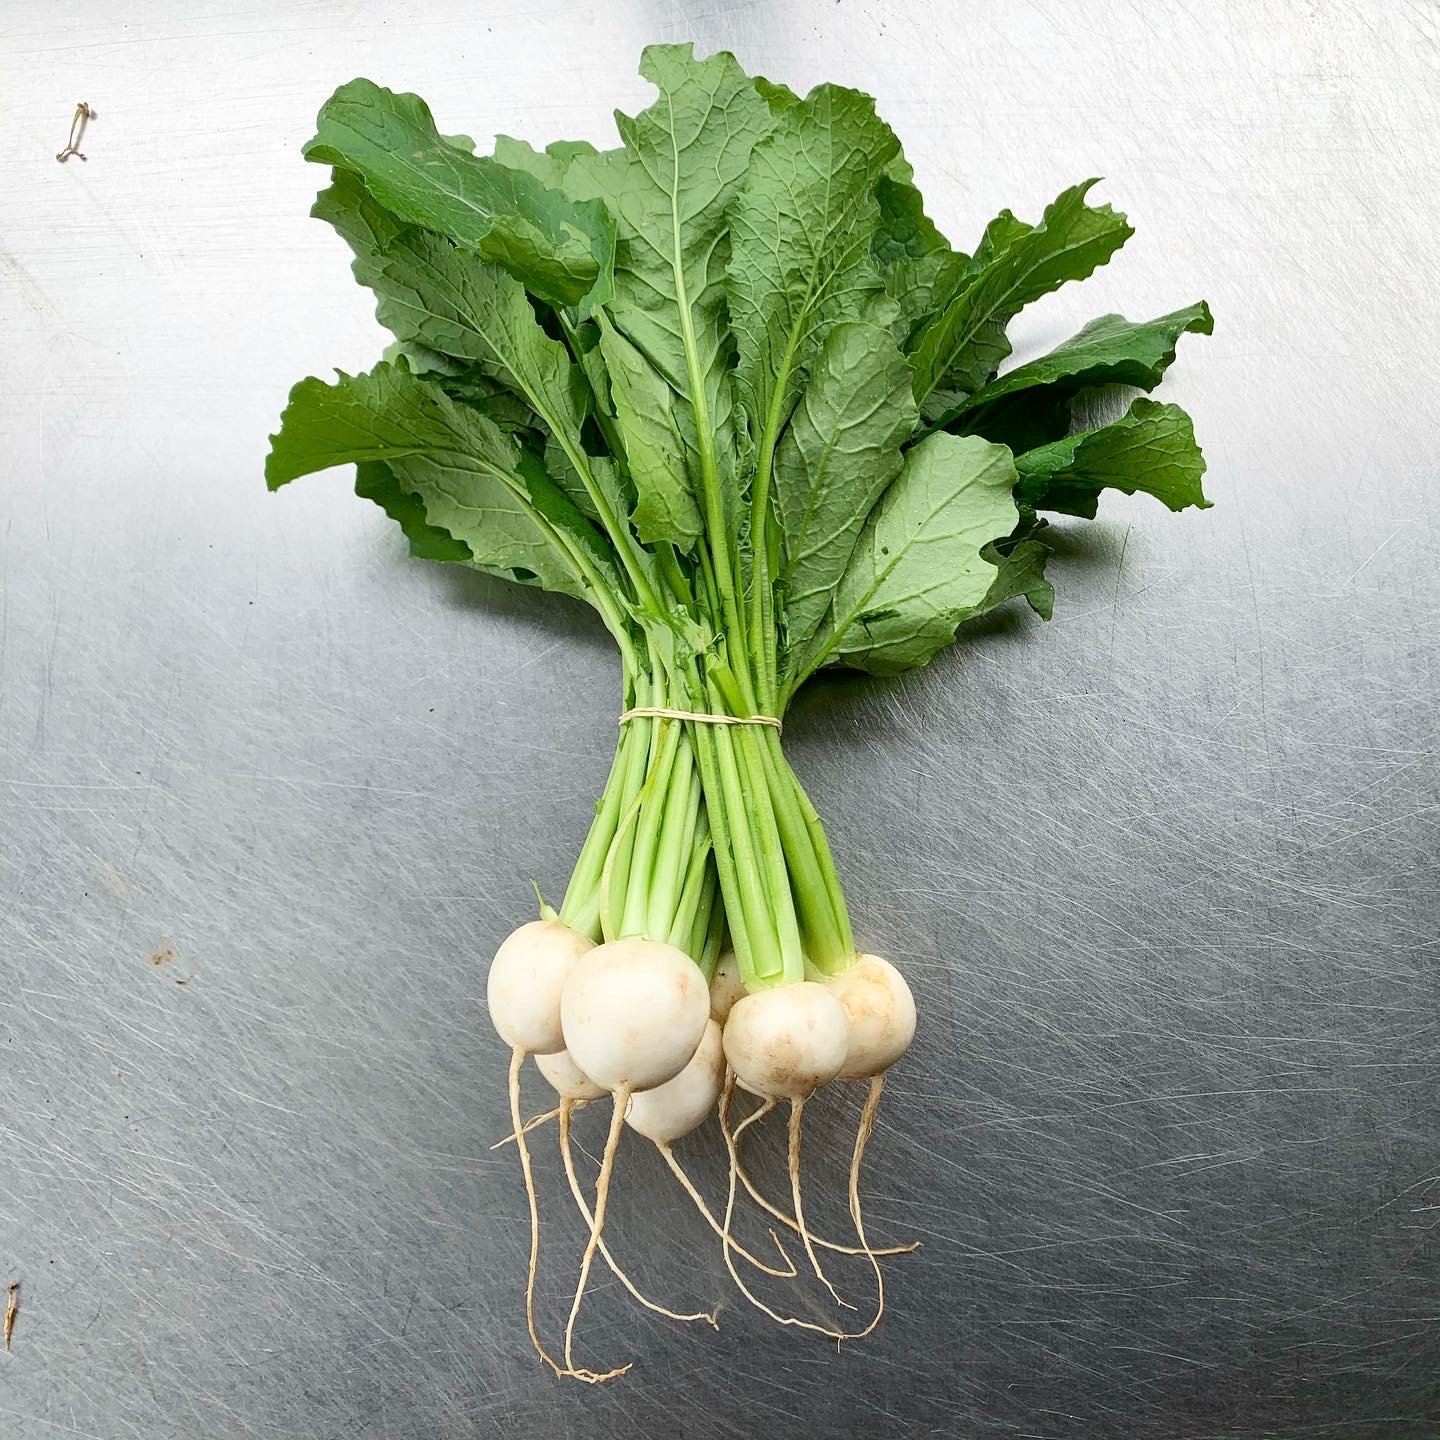
Our hakurei / japanese / salad turnips are at their peak right now, and they went into all our CSA shares this week. I’ll be honest that turnips were not a vegetable that I ate (or had any desire to eat) growing up, but now I’m busy making up for lost time!

These turnips are so tender and juicy that they’re delicious even when eaten raw, though they are especially good when sautéed in butter or roasted until crispy in the oven. I love cooking with both the turnip roots and the leafy green tops… bonus points if I can incorporate both the tops and roots in the same dish! Because I know many of you may think you don’t like turnips… I’m sharing a few of my favorite turnip recipes in hopes that you’ll give them a shot:

TURNIP RECIPES !

Today’s Stats

  • Low temp: 48F

  • High temp: 67F

  • Sunrise: 7:37am

  • Sunset: 6:24pm

  • Moon phase: Waning gibbous

  • Additional notes: Rainy morning turned into a lovely afternoon

October 21

IMG_7363.jpg

Farm Notes

After four months of slowly but surely growing underground, as of this week all of our sweet potatoes have been harvested! It was hard and tedious and dirty work, but thanks to our awesome crew + some very helpful friends, we harvested around 200lbs of tubers. While that’s not too shabby, I’ll be honest that I was hoping for a much bigger harvest. We definitely learned some important lessons in this first season of growing sweet potatoes, and I’m eager to give them another try next season.

Sweet potatoes take so long to grow (typically 90-120 days), and they produce a ton of green matter that takes up a LOT of valuable real estate in the main growing season. This means that sweet potatoes end up hogging a lot of bed space that we could otherwise devote to a more diverse range of vegetables. Sweet potatoes also thrive in soft, loamy soil with lots of organic matter, and much of the soil on our farm is still pretty heavy clay – which means most of our potatoes are super wonky sizes and shapes (as the tubers can't grow as freely in clay-heavy soils).

Sweet potato harvest, in progress!

Sweet potato harvest, in progress!

To address both of these issues, next summer we are going to try a totally different method of growing these tubers… grow bags! Grow bags are literally large bags made of plastic or cloth, which you fill with dirt/compost and can grow just about anything out of! One of my farmer mentors grows all their sweet potatoes in 15-gallon grow bags, and they’ve reported it works like a charm. By using grow bags, you can cultivate sweet potatoes without taking up precious bed space AND you can fill the bags with high quality compost that helps the tubers to grow especially nicely. For any of you hoping to give sweet potatoes a try, but you don’t have much space to spare, I highly encourage you to try the grow bag route as well next year.

No other big updates from the farm this week… but looking ahead to next week, we are planting our garlic for 2022! I’m excited to show y’all our process for planting garlic – it’s a super fun and satisfying plant to grow, and you don’t need a ton of space to give it a try.

Kitchen Notes

IMG_0234.jpg

This week, our full share CSA members got one of my favorite fall veggies in their boxes… mini honeynut butternut squash! (PS – don’t worry to our small share folks, you’ll get honeynuts next week)

Honeynuts are a relatively new type of butternut squash hybrid, which have been specially bred for their petite size and super sweet flesh (if you’re curious about the history of honeynuts, there is a great article here).

While you can cook these just like you would any other kind of butternut squash, my go-to method is SUPER simple – just cut the squash in half lengthwise, slather each half with a bit of olive oil (or butter), salt, and pepper and roast in a 400F oven for about 25-30 minutes until the flesh is super tender.

Here are some links to a few other recipes I found using honeynut squash, if you feel inspired to cook up some of these lil cuties this fall!

Today’s Stats

  • Low temp: 58F

  • High temp: 78F

  • Sunrise: 7:30am

  • Sunset: 6:33pm

  • Moon phase: Waning gibbous

  • Additional notes: Another glorious fall day!

October 19

Farm Notes

Oh, how I’m loving these chilly autumnal evenings and mornings! We’ve had a glorious stretch of sunny fall weather around here, with highs around 75F and lows in the 40s… though I’m preparing myself for the first frost which is surely coming soon. I’m not sure if all farmers feel this way, but I find myself pretty relieved and grateful for the first frost every fall.

IMG_6858.jpg

In this area, the first frost usually happens at the end of October or early November, and by then we have finished all of our planting for the year, and can take a deep breath of relief and gratitude that we made it through another growing season. Granted, there are lots of growers who continue planting + harvesting through the winter (bless them!), but for now I’m happy to take a bit of a break between December and February. Because even though we aren’t harvesting in the winter, there are plenty of farm projects that have been neglected all year that can finally be addressed! Because I’m a total type-A list kinda gal, I’ve already made a (continually-growing) list of farm projects that I’m eager to tackle this winter / early spring 2022.

Here’s what I have so far on our winter project list:

  • Plant additional fruit trees (figs, mulberries, persimmons, pear)

  • Prep + plant perennial pollinator hedge along blueberry patch

  • Prep + plant blackberry patch next to blueberries

  • Prep + plant asparagus 

  • Spread wood chips around berries and asparagus patches

  • Bush hog the “back 5” (aka the wild area on our farm outside the garden)

  • Clean + organize inside the barn !

  • Re-organize and streamline wash/pack area

  • Build a 3-bin composting set-up

  • Build raised bed boxes in front of barn for herbs and flowers

And now I’d love to know… how are you feeling about the first frost of the year? Has it already frosted where you live? What are some of your winter projects that you hope to tackle?

Kitchen Notes

1FCF8904-3A44-418D-AE83-4ED058CFFECE.JPG

One of the keys to eating like a farmer is learning how to properly store fresh produce, to help reduce unnecessary food waste. It’s not always intuitive to know how to best store things like carrots or beets or fresh lettuce – and there is nothing worse than having to toss perfectly good produce that has been languishing in the back of your fridge for far too long. Alas! Today I’m going to share some helpful produce storage tips for different types of produce, to help you maximize the life of your veggies.

PRODUCE STORAGE TIPS

  • BUNCHED GREENS (kale, collards, etc) – Store in a bag (ideally wrapped in damp paper towels) in the crisper drawer of your fridge.

  • LOOSELEAF GREENS – Store in bag (or in a container) in the crisper drawer of your fridge. If greens seem wet, insert a dry paper towel to absorb moisture.

  • LEAFY ROOT VEGETABLES (radishes, turnips, beets, carrots) – Make sure to first cut off any greens/tops (which will help the roots stay crisp) and then store the roots in a bag in the crisper drawer of your fridge. Root veggie greens are edible and versatile as well, so I encourage you to store the greens in a separate bag in your crisper drawer and cook with those too!

  • CUCUMBERS, SUMMER SQUASH & PEPPERS – If using in the next few days, it’s okay to leave these veggies out on your counter, as they don’t like to be super cold. If storing in fridge, store in the front where your fridge is warmest.

  • TENDER HERBS (basil, cilantro, dill, parsley, etc) – Store stems in a jar of water (like a bouquet of flowers) and keep out on your counter (or in your fridge). Keep water fresh and cut the stems periodically to extend shelf life.

  • HEARTY HERBS (rosemary, thyme, sage, etc) – Wrap herbs in a damp paper towel and store in a plastic bag in your fridge.

  • (DRIED) ONIONS & GARLIC – Store on your counter or in your pantry (ie room temp).

  • (FRESH/GREEN) ONIONS & GARLIC – Store in the crisper drawer of your fridge.

  • POTATOES – Store out of the fridge in a cool, dry, dark spot (a pantry is great).

  • TOMATOES – Store at room temperature on your counter, not in your fridge (the cold zaps all the great flavor).

  • WINTER SQUASH – Store out of the fridge in a cool, dry, dark spot (a pantry is great).

Today’s Stats

  • Low temp: 45F

  • High temp: 74F

  • Sunrise: 7:28am

  • Sunset: 6:36pm

  • Moon phase: Waxing gibbous

  • Additional notes: Glorious fall day!

October 14

Farm Notes

What a glorious week of fall weather here in the Piedmont of North Carolina! After a pretty brutal summer, these cool, clear, zero-humidity days remind us why we love farming in this part of the country. Right now we’re still harvesting the last of the summer peppers and eggplant, and the fall greens are really hitting their stride. Between collards, kale (including baby kale), arugula, and heaps of lettuces – there are so many gorgeous dark leafy greens coming out of the field right now, which are a welcomed sight after a tomato-filled summer.

Now for some farm updates:

  • Today we started harvesting our sweet potatoes! After first attempting to begin harvesting them a few weeks ago (when we realized they definitely weren’t ready yet..), we tried again today and were pleased to finally get some nice tubers out of the ground. I’ll be honest that harvesting sweet potatoes is pretty dang labor intensive – they break and scar super easily, so we have to carefully dig each potato by hand using trowels. We have about 150 row feet that need to be harvested over the next few days, and then we will set the potatoes out to cure for 10-14 days. After that, they will be ready to go into our CSA shares, and then hopefully get cooked up in some delish fall dishes.

  • Unfortunately, we’re dealing with a bacterial issue called black rot on some of our brassicas (ie plants like kale, cabbage, broccoli). Black rot is especially common in this region in the fall, when the weather is super hot and humid/wet. It’s incredibly frustrating to see our plants suffering, especially because we’re learning that our brassica seeds/seedlings were likely already infected with this bacteria before ever arriving at our farm, and once they were planted here the bacteria started showing up and causing our plants to wilt and show extensive leaf damage just a few weeks later.

    Thankfully, we’re still able to salvage most of our brassica crops, though our broccoli has been hit the hardest. I’m hopeful that we will still be able to harvest some nice broccoli crowns for our members in the next few weeks… but we will have to wait and see. See below right for a photo of what black rot looks like – if you are dealing with similar issues in your home garden, make sure to remove damage leaves and discard them far away from your garden. Also, in future seasons make sure to plant your brassicas in different beds, because the bacteria can stick around in the soil for long periods of time and re-infect your plants.

Time to dig sweet potatoes!

Time to dig sweet potatoes!

This is what the dreaded ‘black rot’ looks like.

This is what the dreaded ‘black rot’ looks like.

Farm chores with Sawyer!

Farm chores with Sawyer!

And because I know everyone is eager for a baby update… sweet Sawyer is doing great! Last week we tried out our baby carrier for the first time, and I was able to bring him out to the field with me to “help” with a few light farm chores, and it was AWESOME.

It’s hard to believe that this weekend, he will already be 1 month old! I once heard someone say that these early days of parenthood are the “longest shortest time” and I’m already finding that to be profoundly true.

Kitchen Notes

French breakfast radishes

French breakfast radishes

I’m not exactly sure why, but I have such a soft spot for radishes. Whether it’s growing them or cooking them or eating them – I get genuinely excited whenever radishes are around. Alas! I’ve come to realize that my love for this petite and colorful root veggie miiiight not be shared by the general population. Lots of folks tell me that radishes just aren’t “their thing” – or that they don’t know what to do with radishes. And so! In this moment when fall radishes are having a moment, I’d like to dig into some tips + recipes for enjoying radishes, in hope that more of you will join me over in the radish fan club. :)

COMMON TYPES OF RADISHES

  • Round Radishes – Classic round radishes that can be red, pink, or purple in color.

  • French Breakfast Radishes – A special variety of radishes featuring a long, slender shape and a distinctive ombre color from white to pink.

  • Watermelon Radishes – Heirloom variety of radishes with a pale exterior and hot pink exterior.

  • Black Radishes – Just as the name suggests, these are a special variety of radishes with a black exterior and bright white flesh.

HOW TO STORE RADISHES – If the tops are still on the radishes, use a knife to cut them off (as the greens will draw moisture out of the radishes and leave you with sad, limp roots). Store the roots (and greens if you’d like to use them) separately in bags or containers in the crisper drawer of your fridge.

RADISH FLAVOR PAIRINGS & RECIPES

Radishes range in flavor from mild to spicy, and pair well with salty cheeses like feta or goat; bright citrus or white wine vinegar; refreshing herbs like mint, parsley, and chives; as well as alongside cucumbers, avocados, dijon mustard, and salted butter. Here are so go to recipes:

Today’s Stats

  • Low temp: 58F

  • High temp: 81F

  • Sunrise: 7:23am

  • Sunset: 6:42pm

  • Moon phase: Waxing Crescent

  • Additional notes: Glorious fall day!

October 6

Farm Notes

7AA8785C-AAC8-4AFF-A093-B42E30763260.JPG

Baby Sawyer is napping, and I’m excited to hop on and give some updates from the farm! Our sweet babe is doing great, gaining weight like a champ, (mostly) sleeping well, and we are just so dang grateful. I’ll be honest that the first day or two at home as first time parents was a biiit overwhelming and sleep was pretty much non-existent, but thanks to all the incredible support from family and friends over the past few weeks, Matthew and I feel like we are finally getting the hang of things… for now at least!

I’m finding that one key to my mental health in this season is getting at least a little time outside each day – whether that's going for a walk down our country road, sitting out on our porch taking in the sunset, or spending time in the garden lightly weeding, watering, harvesting, etc. I was able to spend a solid hour outside working this morning, which was the longest stretch since Sawyer arrived! And while I'm grateful to be able to get time outside a bit each day, I'm lucky to have an awesome team of folks helping to run the farm this fall, so I can really just focus on spending this special and fleeting time with sweet Sawyer.

An abundance of peppers inside a jungle of a tunnel!

An abundance of peppers inside a jungle of a tunnel!

That said, I'm definitely learning to let go of some things as my priorities shift, and the farm isn't my only "baby" anymore! Let's just say the rows are a bit more weedy than usual, our tunnels have become a tangled jungle of late summer tomatoes and peppers, and the 10-foot tall okra has gone unpicked for weeks.

Alas! The farm is still productive as ever, and this week's CSA members will be getting a bounty of tender fall greens, root veggies, herbs, eggplant, peppers, etc etc.

It's a season of blessed abundance and the best kind of overwhelm, and I wouldn't want it any other way. Many thanks for your patience and understanding as I slowly ease back into farm life – I have a ton of recipes, growing tips, farmbelly specialty products, etc coming your way this fall, so stay tuned!

Kitchen Notes

I’ll be honest that I’ve done ZERO cooking since Sawyer arrived, but we’ve had no shortage of delicious meals thanks to the generosity of our village of family and friends who are keeping our fridge and bellies full. One meal that really hit the spot, especially as we head into cozy fall weather, was a classic meatloaf! I know meatloaf isn’t the sexist dish, and it’s probably not everyone’s cup of tea, but if you’re in the mood for this classic comfort meal, here is my go-to recipe, which is adapted from Smitten Kitchen.

MEAT LOAF WITH TOMATO GLAZE 

Photo credit: Taste and Tell blog

Photo credit: Taste and Tell blog

INGREDIENTS

  • 2 slices sandwich bread

  • 1 yellow onion, diced

  • 1 tablespoon minced garlic

  • 1 celery rib, chopped fine

  • 1 carrot, chopped fine

  • 1 scallion, roughly chopped

  • Olive oil, for cooking

  • 1 1/2 tsp kosher salt, plus more to taste

  • 1  tsp freshly ground black pepper

  • 2 tsp Worcestershire sauce

  • 1/3 cup ketchup 

  • 1 1/2 lb ground beef

  • 1/2 lb ground pork (or omit ground pork and use 2lbs ground beef)

  • 2 large eggs, beaten lightly

  • 1/3 cup minced fresh parsley leaves

TOMATO GLAZE

  • 1 tablespoon vegetable oil

  • 1/4 cup tomato paste

  • 2 tablespoons cider vinegar

  • 2 teaspoons honey

  • 2 teaspoons Worcestershire sauce

  • 2 teaspoons smooth dijon mustard

  • 1/4 teaspoon table salt

PREPARATION

  1. Preheat oven to 350°F.

  2. Tear the bread into chunks and then blend it, in a food processor, into breadcrumbs. Place the breadcrumbs in a large bowl. You should have about 1 cup.

  3. Add the onion, garlic, celery, carrot, and green onion to the food processor, and pulse it until they are finely chopped. Heat a large skillet over medium heat. Once the skillet is hot, coat the bottom with olive oil, and heat the oil for a minute; add the finely chopped vegetables, stirring frequently, until they begin to brown, about 5-8 minutes. Season with salt, pepper, Worcestershire sauce, and 1/3 cup ketchup and cook, stirring frequently, until they begin to brown, about 10 minutes.

  4. While the vegetables are cooking, make the Tomato Glaze: Combine glaze ingredients in a small saucepan, and simmer, whisking constantly, for 2 minutes until and glaze is satiny smooth. Set aside.

  5. Add the cooked vegetables to the large bowl with breadcrumbs, then add the remaining ingredients (ground meat, eggs, and parsley). Stir the ingredients together with a fork or your hands until evenly blended.

  6. Form mixture into a 10-by 5-inch loaf tin and spread tomato sauce over top of the loaf.

  7. Bake in oven 1 hour, or until a meat thermometer inserted in center registers 155°F.

Today’s Stats

  • Low temp: 64F

  • High temp: 80F

  • Sunrise: 7:16am

  • Sunset: 6:53pm

  • Moon phase: Waning Crescent

  • Additional notes: Overcast and humid