February 25

Farm Notes

I’m a bit at a loss for words today, as I sit comfortably in our cozy farmhouse while knowing the untold amount of suffering, fear, and pain happening in Ukraine right now. I’m certainly not qualified to speak on the politics of the moment, but I am committed to learning more about how I (and we, as a global community) can support the people in Ukraine in the days, weeks, and months to come. There are a few food-focused accounts on social media that I am following that I can recommend to stay informed – @oliahercules, @alissatimoshkina, and the hashtag #cookforukraine to name a few.

And in this moment, the best thing I can think to do is to plant seeds. Because I believe there are few things more hopeful or powerful than planting seeds of new life in the face of darkness.

While we work with a few local farms and nurseries to start the majority of our seeds (since we don’t have a proper greenhouse), every season I still start a few trays of seeds that go in our mini indoor greenhouses… and it’s seeding season my friends! If you haven’t started your own seeds before, I totally understand that the process can feel a bit intimidating. But I assure you that YOU CAN DO IT, and I’m here to help walk you through the process with heaps of info below…. ready, set, seed!

Seed Starting 101

SEEDING MATERIALS

*A note that I’m sharing Amazon links for these materials, but encourage you to purchase these items from your local garden shop if you can!

SEEDING INSTRUCTIONS

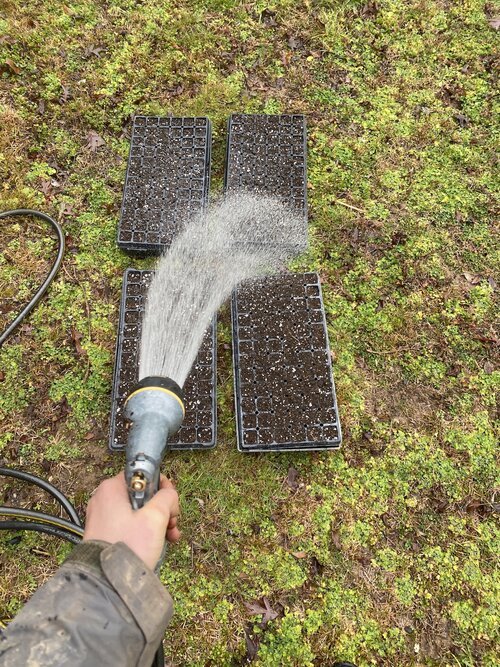
  • Fill each seed tray with potting soil, tapping the whole tray firmly against the ground as you go so the soil settles. Gently soak the soil-filled trays with a hose (make sure you have a nozzle so you can water the trays gently). Alternatively, you can get the soil wet before your fill your tray – but I find it’s easier to first fill the trays with dry soil and then to gently soak them.

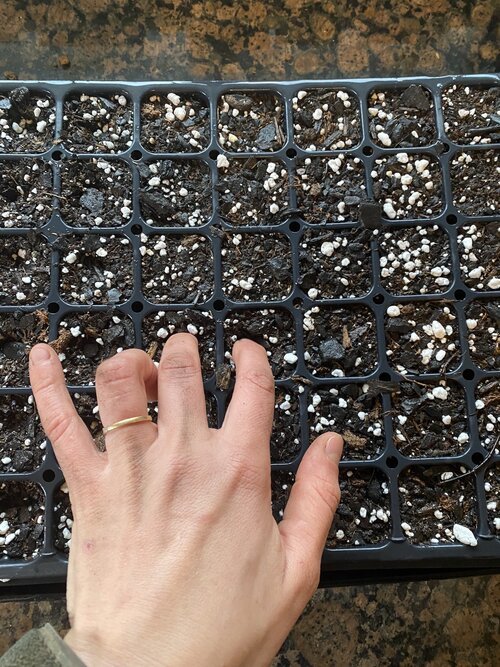
  • Make holes in each cell using your finger, a pencil, or a dibbler. A general rule is to plant the seed to a depth twice its size. Drop 1 or 2 seeds into each hole (unless seed packet specifically says otherwise).

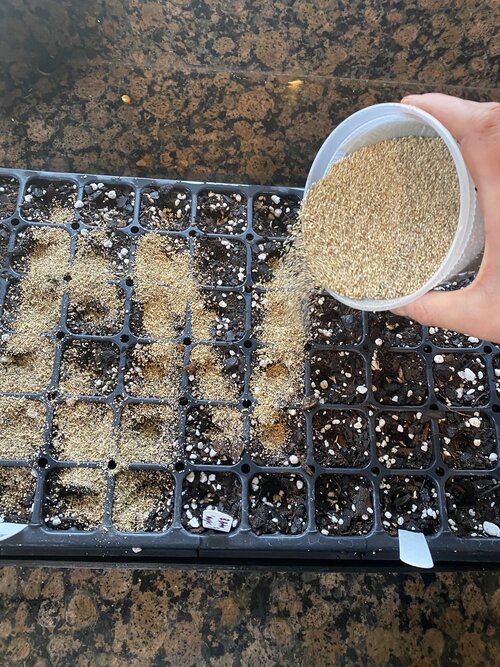
  • Cover the tray with a light dusting of fine vermiculite or seed starting mix, making sure all seeds are covered.

  • Label the tray with the variety name and date sown.

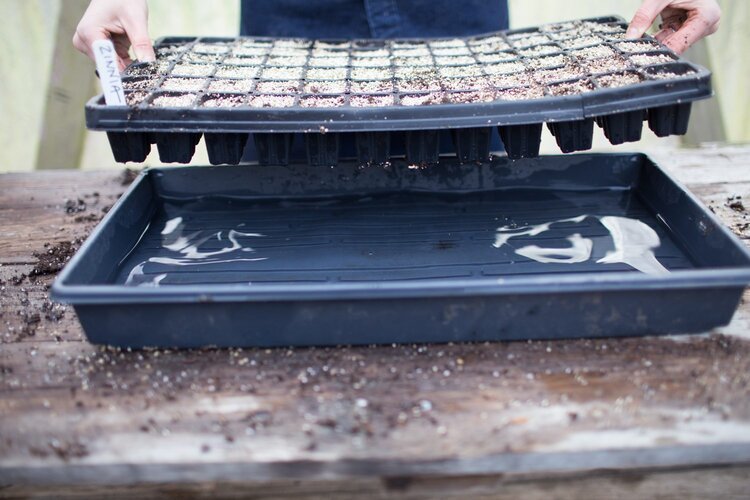
  • Set freshly sown trays into a large plastic tub with an inch of water in the bottom and let them soak up the water from below. Remove once the soil surface is evenly moist. Seed trays should not be watered from overhead until the plant begins to emerge, as a strong blast from your hose can damage your plants.

Photo credit: Floret Farm

  • Cover trays with a clear plastic dome (OR place in your indoor greenhouse) and set onto a 70°F heat mat (optional) or just in a warm corner of the house, consistently above 65°F. Check your seed packet to see if any of your seeds need light to germinate – most seeds do not need light for germination, but some do – and you’ll obviously want to turn your grow lights on (or place in a sunny window) for seeds that need light! A note that many plants can take a long time to germinate (anywhere from 1-3 weeks) so patience is key!

  • If using plastic dome lids over your trays – Once your seeds have germinated, remove the dome and take off heat mat (if using) once seeds have sprouted. Move trays to your greenhouse space and turn on the grow lights. If you don’t have a space with grow lights, a sunny south-facing window is your next best bet.

  • If not using the dome lids and your trays are already in your indoor greenhouse space – Once your seeds have germinated, turn on your grow lights. If it seems too wet in your greenhouse space at any point, roll up the plastic (if possible) to lower the humidity level.

  • NOTE ABOUT GROW LIGHTS: Make sure your grow lights are suspended a few inches above seedlings, keeping them on for 14 to 16 hours per day. As the plants get taller, keep raising the lights so that they are 2-3 inches above the tallest plant.

  • NOTE ABOUT WATERING: Use your finger to feel the soil moisture levels in the trays – if the plants just seem a little dry, gently spritz with a spray bottle filled with water. If the plants see really dry, water them from below by placing in a tub filled with an inch of water on the bottom (like you did when the seeds were first sown).

I hope these are some helpful tips for starting your own seeds this season! In a few weeks, I’ll talk about what to do when your plants need to be potted up into bigger trays, and how to “harden off” your plants before they go in the ground outside. As always, if you have any questions don’t hesitate to give me a holler!

Kitchen Notes

To make room as we start planting for spring, this week I’m harvesting the very last remaining veggies from our winter fields the winter… and I realized we still had few heads of green cabbage hanging on out there!

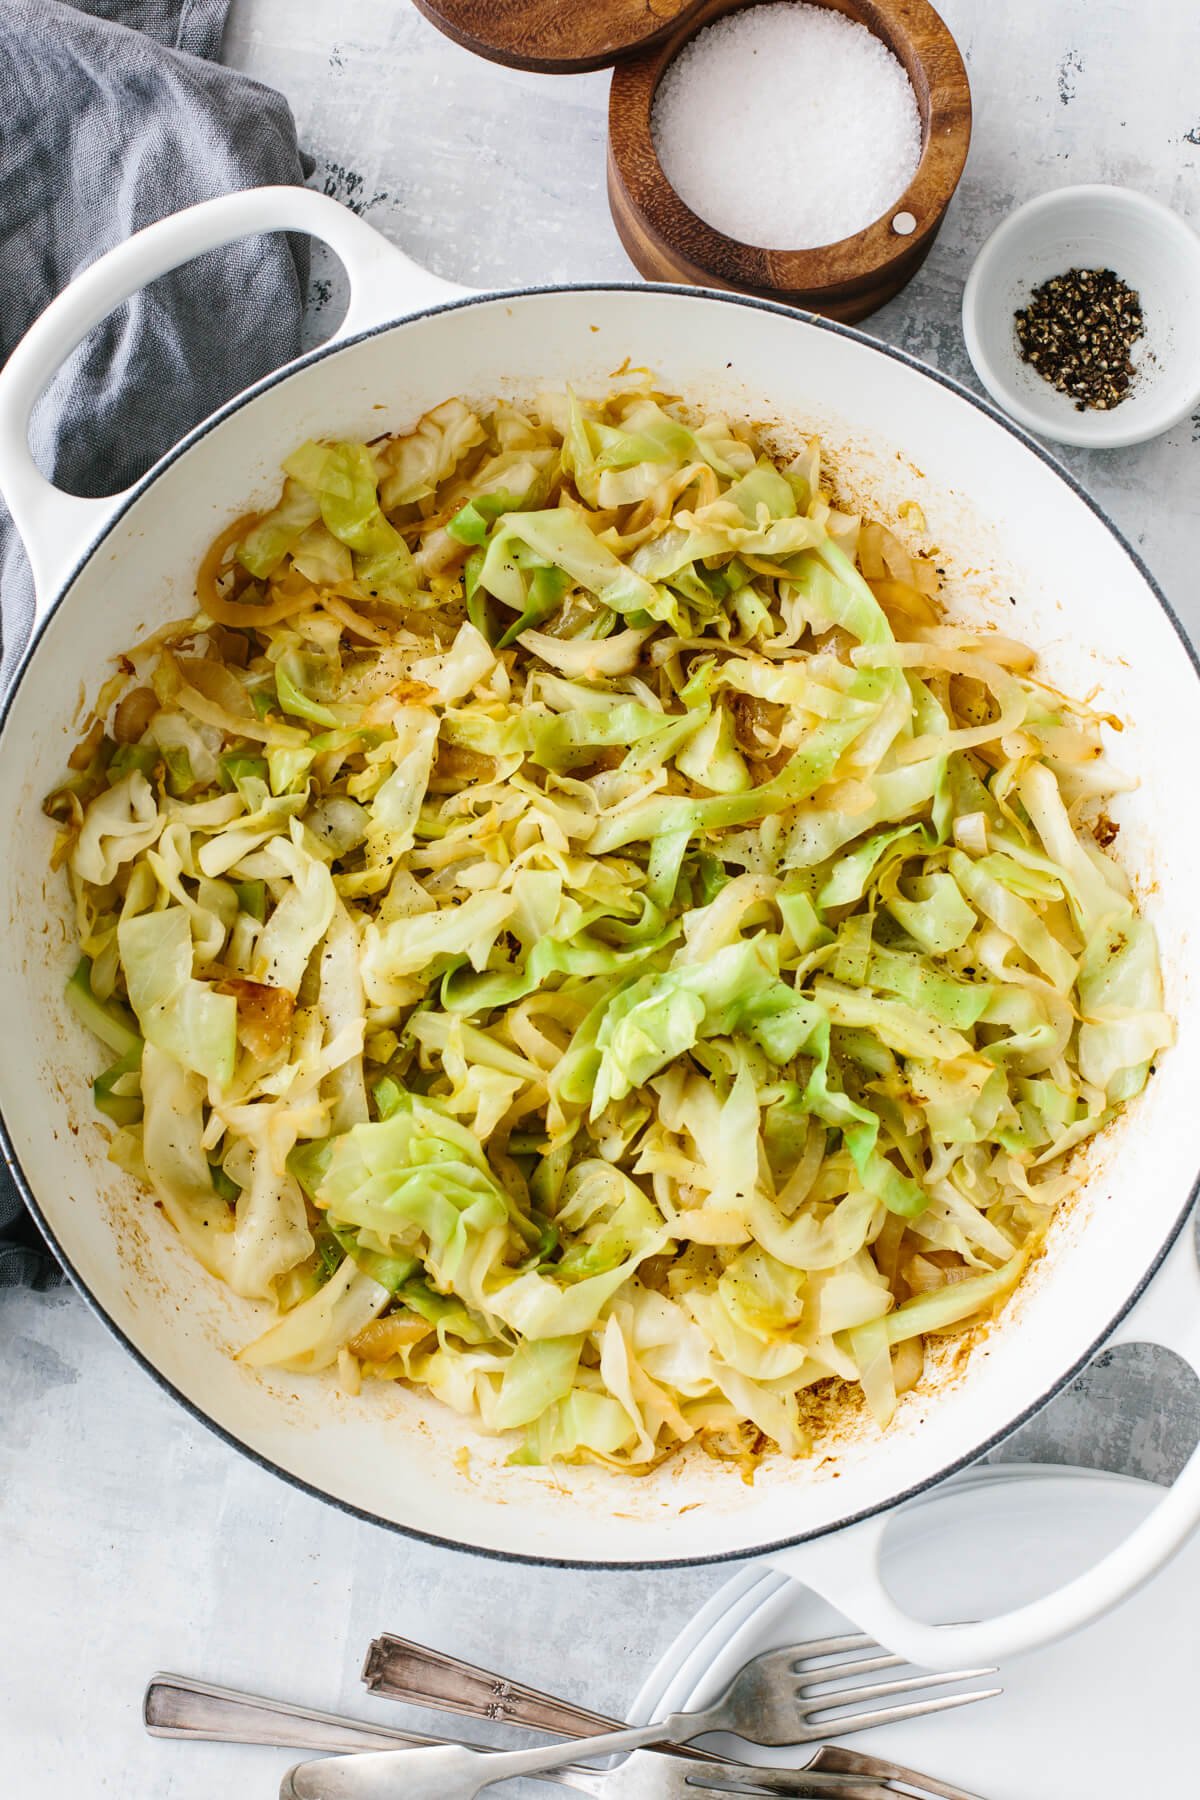
Now, if I have several hours to spare, my go-to cabbage dish is this recipe for Braised Cabbage… but when I’m in a hurry THIS is the recipe I use for equally delicious cabbage that is ready in less than 30 minutes. I know this is one of the least sexy dishes imaginable, but I promise you’ll be shocked by how dang good a humble head of cabbage can taste.

Butter Braised Cabbage

Photo credit: Downshiftology

INGREDIENTS

  • 3 tablespoons butter

  • 1 head green cabbage (around 3lbs)

  • Kosher salt

  • Freshly ground black pepper

  • Splash of apple cider vinegar

PREPARATION

  • Cut the cabbage in half from its top down through its core. Place the cut-side down on your cutting board, then shred it as thinly as possible around the core, then discard the core.

  • Heat a large saute pan or dutch oven over medium-high heat. Add the butter and once it has melted, add the cabbage, 1.5 teaspoons kosher salt, and 1/2 teaspoon freshly ground pepper. Saute for 15-20 minutes, stirring occasionally, until the cabbage is tender and begins to brown. You don’t have to constantly stir – leaving it undisturbed for a few minutes at a time allows the cabbage to caramelize and get extra yummy.

  • When the cabbage has reduced by quite a bit and has begun to brown, remove from heat and stir in the apple cider vinegar. Taste and add a bit of additional salt and pepper to taste. Serve warm.

Recipe adapted from Well Plated.

Today’s Stats

  • Low temp: 35F

  • High temp: 47F

  • Sunrise: 6:52am

  • Sunset: 6:08pm

  • Moon phase: Waning Crescent

  • Additional notes: Cool and cloudy, chance of rain

February 18

Farm Notes

Hot dang y’all… the Farmbelly 2022 growing season has officially begun! Yesterday was as good a weather day as we’ll ever get in mid-February (70 degrees, dry and overcast), so you better believe we hustled to get beds prepped and plants + seeds in the soil. There was rain in the forecast overnight and we have lots more rain coming next week, so it was important to work the ground yesterday before the soil got too wet to work in.

It was an exciting moment to finally pull back the tarps – which have been sitting over the beds since November – and see how beautiful the soil looked underneath! The tarps did their job – no weeds in sight, and the soil was light, fluffy, filled with organic matter, and wasn’t too wet. Covering the soil with tarps all winter makes spring bed prep a breeze – our broadforks (the tool we use to loosen the soil when prepping beds… basically a giant pitchfork) practically sank into the soft soil with ease as we prepped the beds (see photo below for our future carrot beds after removing the tarp and going through with a broadfork).

Future carrot beds after removing the tarp and a quick broadfork to loosen the soil.

Another crop we planted yesterday was our sugar snap peas, which will slowly but surely grow up a trellis all spring until they are close to 8 feet tall, and if all goes according to plan they’ll be ready to pick in mid May. Sugar snap peas are pretty easy to grow, though I do have some helpful tips…

Peas getting seeded!

  • Most varieties of sugar snap peas get pretty tall, so you’ll want to use a trellis! We use 10 ft tall t-posts and stake them in the ground every 8-10 feet down the row, and then we tie up this trellis netting and attach it to the t-posts using zip ties. The trellis netting is 4-feet tall, so we just tie up two layers – one below and one above – so that in all the peas have 8 feet of netting to grow up.

  • To prep the seeds for planting and help with better germination, I soak our pea seeds in water for about 4-6 hours before planting. Another step that isn’t required, but certainly helps ensure that your peas will fix nitrogen in your soil is to coat the seeds with an inoculant just before planting. Inoculants are basically a powdered form of a beneficial bacteria, which encourages the formation of high-nitrogen nodules on plant roots for richer soil, bigger plants, and better yields. Here is a source from Johnny’s Seeds.

  • When it’s time to plant, I make two long furrows in the soil spaced about 4-6 inches apart from each other (in the space between each furrow is where your trellis will go), and in each furrow I plant the seeds by hand, about 1-inch apart. Once you’ve placed the seeds, just cover them back up with soil, water in well, and let the magic happen!

Our beloved Jang Seeder, which makes seeding a breeze.

We also seeded our carrots yesterday! Our first season here, we did ALL our direct seeding by hand, which is fine if you’re a home gardener, but was totally crazy considering the amount of seeds we were planting. So now, most all of our direct seeding is made a million times easier/faster thanks to our Jang Seeder. This nifty tool can be calibrated to directly seed a multitude of different sized seeds at whatever spacing you need, and it takes a job that would have taken hours by hand and gets it done in about 15 minutes. It’s been a game changer for sure!

One thing to note if you’re using the Jang Seeder to plant carrots – you need to buy pelleted carrot seeds. Super small seeds (like carrots, onions and lettuce) are often “pelleted” – meaning that each seed is coated with a layer of clay to increase its size for easier handling and for use in seeding tools. Even if you plan to plant carrot seeds by hand, I recommend getting pelleted seeds, as you are able to see and place the seeds MUCH better!

Last but not least, yesterday I also got some sweet pansies in the ground… pansies are one of my favorite edible flowers for spring, because they are so easy to grow and they don’t mind the cold! So if you want to add some color to your dishes right about now, go pick up some pansies from your local garden store and pop them in a pot or garden bed, and you’ll be glad you did.

Kitchen Notes

It’s been a busy, farm-focused week around here – which means there hasn’t been a ton of cooking going on. So when I really needed some inspiration on a Tuesday night this week, I dug into our Farmbelly Club Recipes page and remembered how much I loved this Sheet Pan Harissa Chicken with Potatoes, Leeks & Herby Yogurt. It’s a perfect weeknight meal that all fits on one pan in the oven, and it’s filled with flavor from the harissa, bright lemon, tangy yogurt, and fresh herbs.

So don’t forget there are a ton of recipes on our Farmbelly Club Recipes page, with more getting added every week, so go check them out when you need some inspiration for eating like a farmer!

Today’s Stats

  • Low temp: 26F

  • High temp: 62F

  • Sunrise: 7:01am

  • Sunset: 6:01pm

  • Moon phase: Waxing Gibbous

  • Additional notes: Rainy and warm

February 11

Farm Notes

The days are getting noticeably longer (finally!) and slowly but surely I’m dusting off the cobwebs and getting myself back into “farm shape” after a good long break this winter. This week we’ve been busy checking some big projects off our to-do list… last weekend, we built some proper end walls for our caterpillar tunnels, with an ingenious design that lets you easily roll up/down the plastic on each end!

I’ve been wanting to build proper walls for the ends of our tunnels for years, so I was thrilled to see how well they work and how nice they look. This end wall design was created by a farmer friend of mine, and if you’d like any more info on this design, materials needed, just let me know and I’d be happy to share my notes.

This week we also spent more time getting our perennial garden ready for spring, and yesterday we sheet mulched a large section of the garden – which means we laid down big strips of kraft paper directly over the ground, followed by a thick layer of compost on top of the kraft paper.

Sheet mulching!

Sheet mulching (sometimes called lasagna mulching) is a process of creating a new garden bed over an area of grass by layering on “sheets” of organic matter – it’s a simple, passive way to create a new growing space with minimal effort and zero digging. Cardboard is typically used for sheet mulching, but we have found that using long rolls of kraft paper will also work. If you’re interested in learning more about sheet mulching, here’s a great video tutorial.

Looking ahead to next week, we will continue prepping growing beds for the sugar snap peas, carrots, greens, asparagus, and blackberries that will be going in the ground soon.

If you have any questions about getting your garden ready for spring, don’t hesitate to reach out!


Kitchen Notes

Shakshuka is a traditional dish from North Africa with lots of variations – but essentially it’s a skillet filled with a hearty tomato sauce with onions, peppers, spices, and some poached eggs on top. I like to serve shakshuka over a bed of basmati rice, topped with some fresh parsley or cilantro, avocado, and some salty feta cheese. It takes less than 30 minutes to pull everything together, and makes a pretty darn perfect weeknight meal if you ask me!

Shakshuka

Photo credit: Sandra Valvassori

INGREDIENTS

  • 2 tablespoons extra-virgin olive oil

  • 1 yellow onion, chopped

  • 1 red bell pepper, seeded and diced into 1/2” pieces

  • Kosher salt

  • Freshly ground black pepper

  • 3 medium garlic cloves, minced

  • 1 teaspoon smoked paprika

  • 1 teaspoon ground cumin

  • 1/4 teaspoon red pepper flakes

  • 1 28-ounce can crushed tomatoes (diced tomatoes will work too)

  • 2 tablespoons harissa paste (mild or hot, your preference)

  • 1 tablespoon tomato paste

  • A few handfuls of fresh spinach, roughly chopped

  • 3 to 5 eggs

  • ⅓ cup crumbled feta cheese

  • ¼ cup fresh parsley leaves

  • 1 avocado, diced (optional)

  • Toasted bread (optional)

PREPARATION

  1. Heat the oil over medium heat in a large lidded skillet. Add the onion, red pepper, 1/2 teaspoon salt, and several grinds of fresh pepper and cook until the onion is soft and translucent, 6 to 8 minutes.

  2. Reduce the heat to medium-low and add the garlic, paprika, cumin, and red pepper flakes. Stir and let cook for about 30 seconds, then add the canned tomatoes, harissa paste, and tomato paste. Simmer and stir occasionally for 15 minutes until the sauce is thickened.

  3. Add the spinach and stir until wilted. Use a large spoon to make wells in the sauce and crack an egg into each well. Cover and cook over medium heat until the eggs are set, about 5 minutes – though the timing will also depend on how runny you like your egg yolks.

  4. Season with salt and pepper to taste and sprinkle with the feta, parsley and avocado, if using. Serve over basmati rice and with toasted bread for scooping.

Today’s Stats

  • Low temp: 39F

  • High temp: 61F

  • Sunrise: 7:09am

  • Sunset: 5:54pm

  • Moon phase: Waxing Gibbous

  • Additional notes: Sunny and warm

February 4

Farm Notes

Yesterday while working in the garden, I felt the very first warm breeze since last fall, and it made me so dang excited for spring. I know this first glimpse of warmth was fleeting and we have a lot more winter ahead, but something about feeling those first hints of spring always lifts this farmer’s spirits.

It’s been a busy week here at the farm… I can’t believe it’s already February, as this month is when we start planting lots of veggies for spring! I’ve been putting the finishing touches on our planting calendar, and in a few weeks we will fill our caterpillar tunnels with swiss chard, lettuce, radishes, turnips, arugula, and baby kale. (A reminder that I’ve shared an excerpt of the planting plan that we use HERE in case it’s helpful for you). And while those veggies grow in our cozy tunnels, at the end of February we will also start planting outside… sugar snap peas, carrots, asparagus and blackberries!

Speaking of asparagus and blackberries… they are going in our new perennial garden space, and after lots of research I finally placed the orders for those plants this week. For the asparagus, I’ve chosen a newer variety called Millennium that has been proven to grow well in our region’s clay-heavy soils (purchased from Nourse Farms). There is an art and a specific method to successfully planting + growing asparagus, so I’ll definitely take y’all along for the ride as we prep the growing bed and when we plant our asparagus crowns later this month.

In the berry department, I spent waaay too long digging into the many different varieties of blackberries and finally narrowed it down to two varieties, which I purchased from Isons Nursery. For anyone looking to plant blackberries and wanting to learn about the different varieties, here is a great resource from NC State. I’ve decided to plant two varieties of blackberries – Natchez and Ouachita. Both are known for large fruit, high yields, and have an erect habit, and they both have harvest windows in June/July, which was a big deciding factor for me. Some of the blackberry varieties I was considering turn ripe in August, and the thought of harvesting berries for hours in the brutal heat/humidity of August in NC was a no-go! Growing berries is a whole new experiment for me, and I’ll be honest that I feel like such a beginner… which is humbling AND it’s also part of the fun and is exactly why I love farming so much.

This week we also made big progress on our perennial garden! As you can see in the photo below, we have pretty much finished laying out the space, and now we are beginning to build out the growing beds. One of the main features of this new garden is a large gathering area in the middle, where we will have tables and a nice space for hosting workshops, farm dinners, etc. From each corner of the garden we have walkways that lead into the middle… all the spaces you see covered in the black landscape fabric will be covered with mulch later this spring. On the short ends of the garden, we will have 6-7 curved growing beds for culinary + medicinal herbs, and long sides of the garden will be filled with wildflowers and other perennials. Along the western edge of the garden (closest to our deer fence) is where our asparagus will be planted. Slowly but surely, this space is coming along and I’m excited to continue documenting the process, in hopes that there will be helpful nuggets of information for some of you. A note that I’ll be saving documentation of this project in a highlight on my Instagram, which you can see here.

Kitchen Notes

It’s still soup season y’all! Here’s a recipe for one of my favorite hearty winter soups, which always brings me back to cozy snow days growing up in the midwest. It’s one of my go-to recipes to make and bring over to family/friends who may need some extra love and a hot meal, and the leftovers taste even better the next day!

WHITE BEAN CHICKEN CHILI

INGREDIENTS

  • 2 tablespoons olive oil

  • 2 yellow onions, diced

  • 1 can (4-oz) diced mild green chiles

  • 2 tablespoons ground cumin

  • 1 tablespoon dried oregano

  • 1/4 teaspoon crushed red pepper flakes

  • 4 cloves garlic, minced

  • Kosher salt

  • 6 carrots, chopped in 1/2-inch rounds

  • 1 lb small red or yukon gold potatoes, washed and quartered

  • 3-4 lb cooked rotisserie chicken, meat removed and shredded

  • 4-6 cups chicken broth

  • 3 15-oz cans white beans, drained and rinsed

  • Handful freshly chopped parsley (optional)

  • Shredded parmesan cheese (optional)

  • Plain greek yogurt (optional)

INSTRUCTIONS

  1. Heat olive oil over medium-high heat in a dutch oven or large saucepan. This recipe makes a lot of soup, so be sure to use a big pot/saucepan! Add the diced onions and a pinch of kosher salt and cook until translucent and beginning to brown, stirring occasionally, 4-5 minutes.

  2. Stir in the can of diced green chiles and cook for 2 minutes, stirring occasionally. Add the cumin, oregano, red pepper flakes, garlic and 1 teaspoon kosher salt and cook for 1-2 minutes, until fragrant. Stir in the carrots and potatoes, coating them in the spices.

  3. Pour in the chicken broth, bring to a boil, then lower the heat and gently simmer - partially covered and stirring occasionally - until the potatoes and carrots are tender, 15-20 minutes. Next, add the shredded chicken and white beans, heat on until warmed through, about 10 minutes. Taste and adjust seasoning as needed.

  4. Turn off the heat and let the soup sit for 15-20 minutes to let the flavors meld together. Reheat if needed and serve topped with chopped parsley and shredded parmesan. This may sound weird, but I also love eating this soup with a dollop of tangy plain greek yogurt!

Today’s Stats

  • Low temp: 29F

  • High temp: 66F

  • Sunrise: 7:17am

  • Sunset: 5:47pm

  • Moon phase: Waxing Crescent

  • Additional notes: Rain!